Friday 6 December 2013

Final Images


Photographed by Nisha Haq

Evaluation

Evaluation

When being introduced to the project brave new world is was very fascinating and exciting because of all the elements that could be explored and shown. Starting off by looking at scarring and body modification was very knowledgeable as I did not know too much about either of these subjects or the culture behind tribes who use scarification. I found the seminars very informing and thought provoking along with exploring different techniques and sfx skills in are practical lessons. Both these elements allowed me to explore using different materials to place and be used on the body and think of different resources that could be used to alter the body’s appearance. I researched into various aspects of the project looking briefly at tribes and there scarification along with notes on why they have these different scars and appearances. When exploring materials I looked at many artists such as fashion designers, photographers, jewellery makers and many others who used materials or objects to alter the body’s presence in dissimilar ways either with make-up, garments or accessories. This helped me to see and think about what I could use for final looks and images; I had ideas of what I wanted to do in my head the issue was trialling these to see if they worked and also timing along with another project. One of my looks I trialled and photographed which went ok, but when I came to doing the whole look together with everything it just did not work, this meant I had to change and reconstruct a different idea completely scrapping the one I had giving me less time. Overall I am happy with my final images and models I would of liked a longer period of time to design and make something myself that could of altered and changed the body but used what time I had to explore ideas. Even though I am happy with my images I wish I had given myself more time to explore different designs and materials that could have potentially worked better and photographed better for my final images. I also would have preferred to have shot both or one of my images out of a studio which I had planned on doing but had to change due to circumstances. I felt this project was more rushed with not enough time to really explore as much as I would of liked to and found it more time consuming and hard to time manage along with another big project that was also quite time consuming.

Technical file sign of sheet


Thursday 5 December 2013

Look Two Final Images.


I am really happy with how my second images turnt out I like the simplicity of the bottom images and then I like the difference of the top images with the added effect of the necklace adding a brightness of colour and shape. My original idea for this look changed slightly as the gelatine dots on the forehead were meant to have wire threw these with beading on the ends adding to the jewelled effect of the look. When I tested this out I did not actually like this idea as it was to much and needed to be simplified. This ended in me just using everything else but the wire beading effect on the head which I much prefer looking at the outcome of the images. While creating the look the one thing I was worried about going wrong was the hair, I had not practised this properly with the fullers earth cracked effect on the side along with the middle section being pulled back and up as if distorting the shape of the head, I think that the hair turnt out well though and really like the added effect of the fullers earth that I have coloured white on the side of the hair. Overall I am happy with how the design and images turnt out for this look and the photography did not go to badly either which was a bonus.

Moodboard look 2


Ideas behind my look.

For my second look I wanted it to have some more fashion elements within it along with tribal influences with scarification again and some of the colourful jewellery worn. I have also used influences from jewellery makers especially one that I have on my blog already named Burca Buyunkunal who creates facial jewellery distorting the face and its features. I wanted to keep the colours for this look white and nude and have bright jewellery to add colour. 


Here is a face chart created for the final idea along with images of my second final idea as I created this. This look was designed looking at facial jewellery and enchantments changing the features on the face along with adding objects that change the look of the face. I wanted to do this as I find this an interesting prospect that we can change the features of are face just by adding something or pulling and pushing it in different direction by adding materials. I wanted this image to be more about body modification changing the structure of the face with objects added using prosthetics and materials along with making it look more fashion and catwalk based. For the hair I wanted this to be big distorting the head into a funny shape as if the head is the shape of the hair.

Look One Final Images


Images above photographed by 'Nisha Haq'


Necklace Provided By 'Keiron Levine'

Above are a few of the best images from my final look. I am really happy with how this look turnt out and also had a beautiful and perfect model for my final design which helped my design even more. While creating the finished version of this design, a few things changed within the design process, including the fact that I was originally going to shoot these images outside as I wanted a background that had more nature within it, this changed due to having Keiron Levine in and him bringing all his accessories and a lecture advising me that my model might get and look very cold within my photographs if done outside. Something else that changed within my design was the placement of my scarification/gelatine dots, this was because my model originally was going to have her breasts out for the shoot but starting to place the dots around the top of her chest decided that I wouldn't do this and ended up moving the scarification dots to just above the breasts and up and along the arms. I do now wish that even though I like this design that I had done my original design as I think it could of looked really nice. Overall I am happy with my final design and images and especially the ear pieces I made to make it look like she has stretched earlobes, and am happy I got to use one of Keiron Levine's amazing necklaces. 

Moodboard Look One

Ideas behind my look

Above is a mood board I created with a few of the more high impacted images that helped me develop my final design. There are influences of tribal elements which I have decided to include as I really like the look of all the scarification on the body. I have also included textured images and also more fashion/catwalk images showing the hair idea I would like and also some of the colours I will be using within the final design. 


Above is the face chart along with design ideas for my first look.This look has been designed from influences such as scarification along with texture and tribal influences. The face has a lot of texture within in with the lower area such as the chest and arms containing more of the scarification idea creating scar like designs using gelatin around the chest area creating a nice design. I will also be making some prosthetic ear pieces out of gelatine so it looks like my model has stretched earlobes.


Keiron Levine


Keiron Levine brought in all his accessories that he makes which are amazing. It was so inspirational looking at all these amazing things he had put together and all the different materials and accessories he used to make his jewellery, hats etc just showing how you can really make and create anything with and out of everything if you put your mind to it. He was kind and we were lucky enough to be able to play and try on all his accessories and even use them within some of are shoots we were doing on the day which was amazing. 

Wednesday 4 December 2013

Practise for final looks.


Above are the images of me practising one of my final looks on myself for my first image to do with brave new world. For this look I wanted to create quite a textured look as I really like textures and how they can look and wanted to use products we had been working with. To do this look I actually used putty which is something we had not experimented with but that I knew could block out eyebrows and I could manipulate to create a texture. At first I had issues with the putty as it is quite fiddly to apply to the face and un sticks easily especially if your hot, and I had trouble trying to get it to flow along the eyebrow. Once I covered the eyebrows it had created a texture in itself which I liked which I then went and applied tuplast over the top to get more of a wiggly line movement just to add more texture and movement to the effect. Underneath the eye I just used putty without tuplast as the tuplast has such a strong smell and under the eye is very sensitive. I really liked the effect of the putty and tuplast together which I then added a bronze coloured effect over the top to really highlight it and make it stand out along with a silver at the bottom of the eye.


These are ideas towards my second final image for brave new world. My initial idea for this look was to create a round shape of gelatine dots and to have wire threaded threw these with beading on the ends almost like the wire was under the skin and the scarification had grown over the top. I brought some thin wire and practised how I could put this threw the gelatine it worked as the wire was so light but after sticking one of these on the head it took me quite a while and I actually decided I wanted to simplify the design as it had to much going on and I couldn't get the wire to sit straight making it look weird and not how I had pictured it to look.
Some of the many gelatine dots and shapes I created.


Original Final look..


These are some images I took of one of my original ideas that I practised and shoot in the studio. When shooting and creating the images a lot of things were going wrong such as setting the gelatine dots that I wanted to apply to the head, and also I was having problems with the latex textured neck piece I made and sticking this.  I also realised when coming to shoot this look you couldn't really see the neck piece as well as I wanted and overall at the time I was not happy with this look so ended up not taking proper images as I also couldn't get the camera and lighting to work that well either so it was not the best day. Now looking back at the images they are not as terrible as I thought and I think I could of worked something out to make this look work but at the time was just not in the right frame of mind but I am glad I photographed this. 


Sunday 1 December 2013

Images from books which feature body adornment.

Image from the book 'Extreme Beauty in Vogue'


Image from the book 'Extreme beauty in Vogue'

Image from 'Nick Knight' book

Image from 'Nick Knight book'

Tuesday 19 November 2013

Quick sketch ideas for final ideas.

When I think of ideas for designs I have to scribble them down writing down exactly what I wanted to do along with drawing a bit of a crappy little drawing designs. These are some images of my ideas that I scribbled down quickly on pieces of paper along with notes on the ideas for these designs.  


Face chart of one of my original final ideas.

Theme of Gold, Silver and White


Images all collected from Pintrest.

I found when I was searching and looking for ideas to do with this project a lot of the images I collected on pintrest were images with colours such as gold, silver and white. I think with this project I was naturally drawn to these colours for some reasons along with liking the designs of the images I came across. As a lot of the images I collected used these colours and a lot of my final designs and ideas are based around similar colours to these. I thought I would create a small mood board with a few of the images I collected inspiring ideas for my designs showing tribal influences, textures, body art, body modification and fashion forward imagery.

Monday 18 November 2013

Practical Lesson Scarring


Creating scars using Wax which is a product that is very popular in sfx, Wax is quite easy to use and you can mould and shape it into many forms and build up its texture on the service of the skin and create shapes easily. You can warm the product up on your hands and then start applying it onto the skin moulding and shaping this either with your fingers or with a palette knife. You can then build this up onto the area your applying it and blend it in you can then add colour to this product to give it diff rent tones and make it look realistic. Below I wanted to create a shape that I could apply across the body, but I couldn't apply the material straight to the body so I made a mould that I could apply my gelatine into so I could make a specific shape. 


                                                                 Experiments 


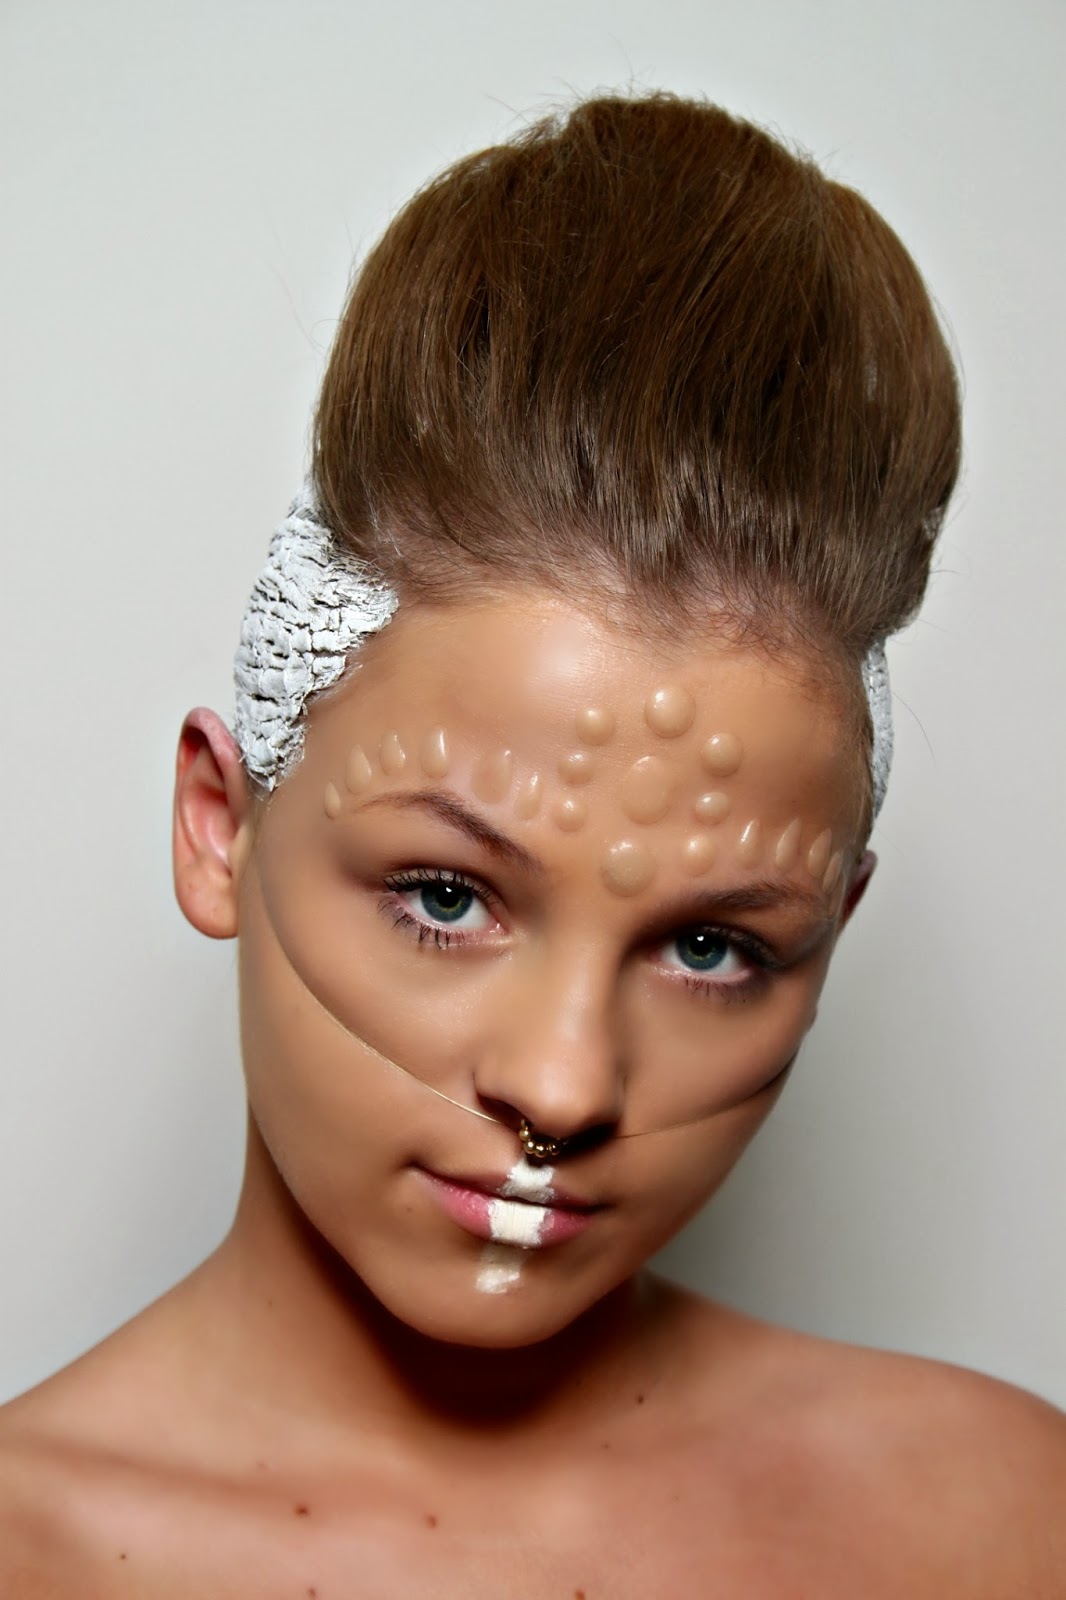
These are some experiments using texture and materials to add and change to the appearance of the body using shapes and also materials such as latex mixed with other materials in such as lace and buttons etc.